Making a witch bottle is easy and you can make them for a variety of reasons. Here, I will show you how to make one for home protection.
6 is the number for protection; so you can add any of these ingredients in multiples of 6. 6 measures of each ingredient or the ingredients can add up to 6. Whatever combination you like.
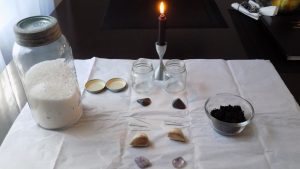
The ingredients are:
- pins
- garlic cloves
- salt
- soil
- red jasper
- amethyst
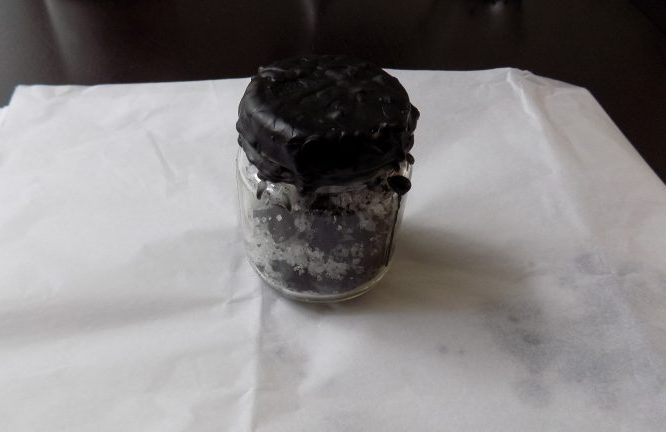
You will need a small jar. I like to use baby food jars. I have a friend with a small child who saves the jars for me and they have good lids, but you can use whatever you have on hand. You will also need a black candle to use its wax to seal the jar.
Bury your completed witch bottle at the entrance of your home. I made two for both of my home’s entrances.
I have found that you don’t need to say any words when making a witch bottle, you only need to visualize it working. Be strong with your intent and the bottle will have plenty of power. My visualization is a huge protective bubble surrounding my entire property.
Place all of your ingredients in the bottle with your chosen visualization and then close up the bottle and seal with black candle wax. The sealing part can take a lot of time if you are using a simple candle. You can also find sealing wax at craft stores which is easier to work with.
Continue the visualization until your bottle is completely sealed. Once you’re ready to bury it, shake the bottle 6 times to activate it’s energy. As you bury it, continue the visualization. You may want to finish with “This spell is sealed so mote it be.” Or something similar.
Feel free to share your witch bottle ideas!
Many blessings,
Lady Black